Cabin
BIRD FEEDER
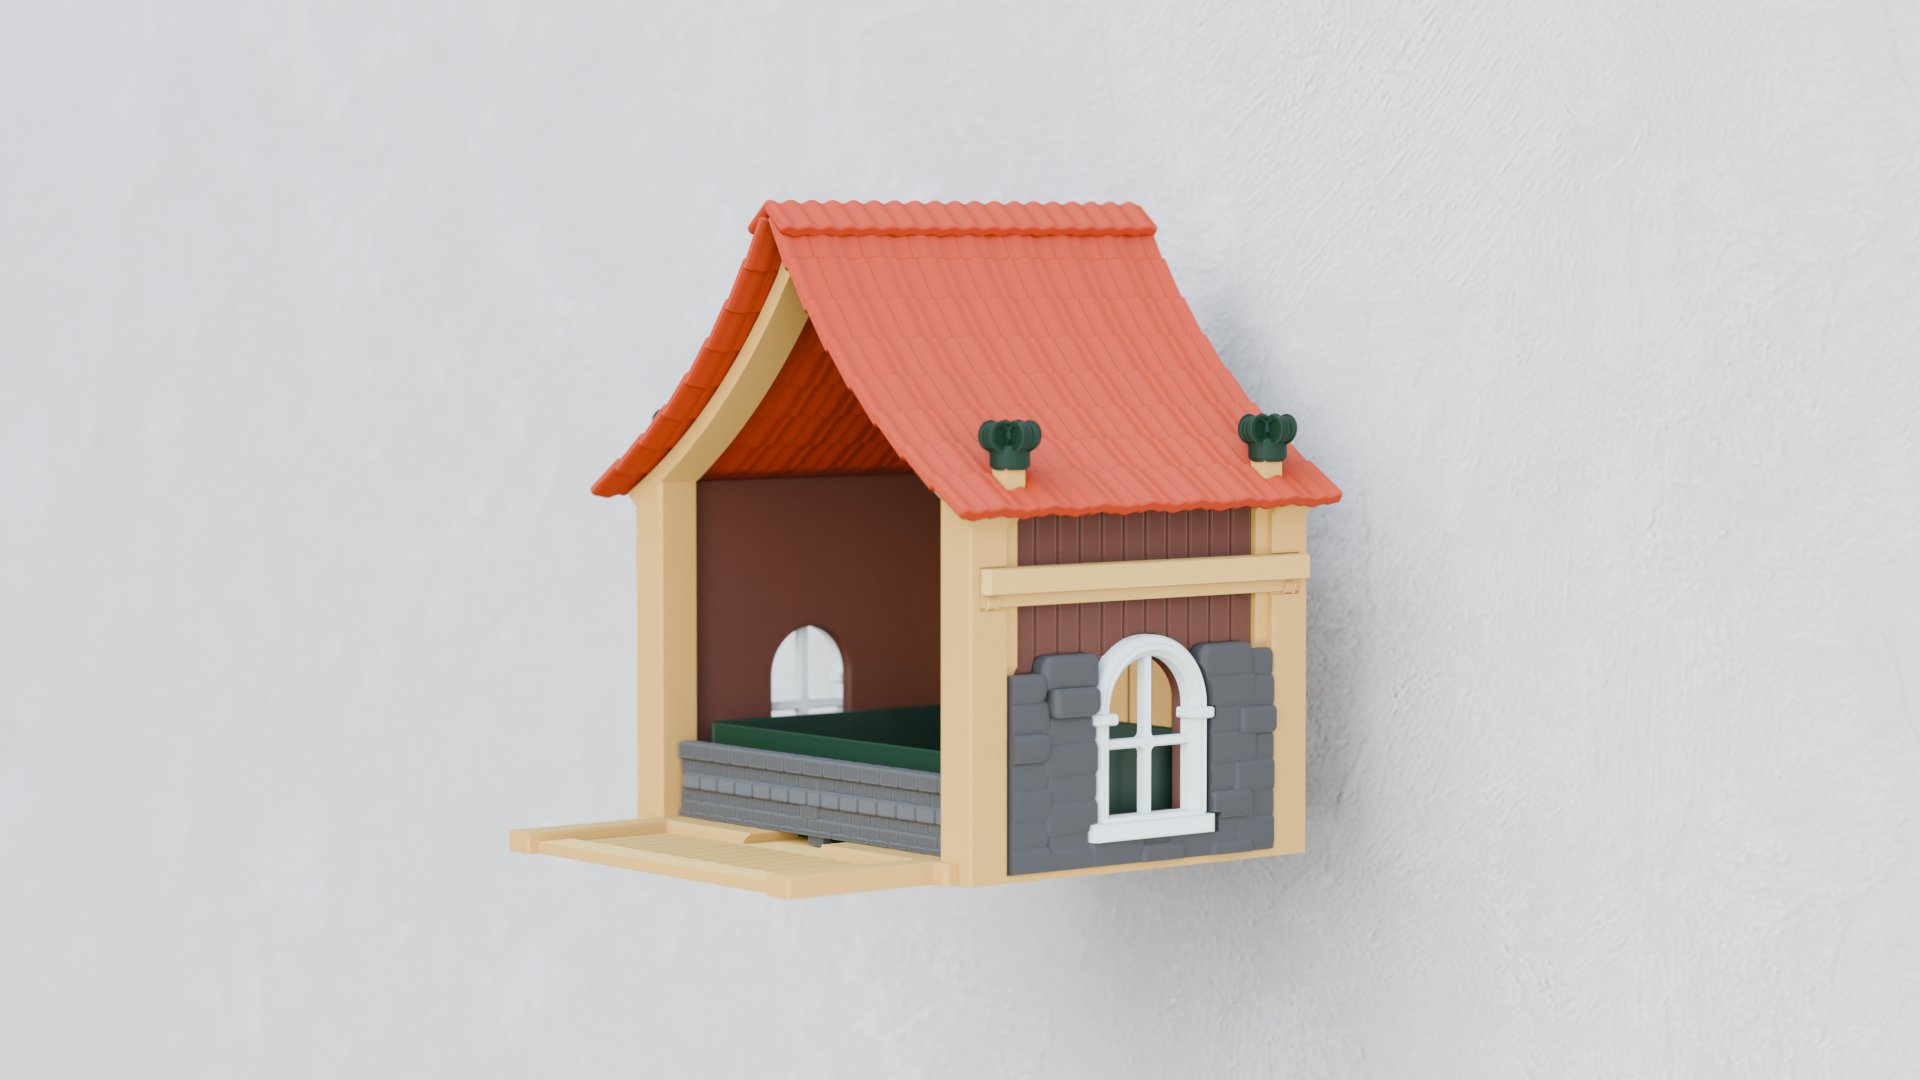
Model Details
Cabin Bird Feeder Kit with Optional Blink Camera Mount
Bring rustic charm to your garden with this elegantly designed cabin-style bird feeder. This multi-part kit combines functionality with aesthetic appeal, creating an inviting feeding station for your feathered visitors while adding a decorative element to your outdoor space.
The modular design features detailed architectural elements including tiled roof, stone accents, window frames, and a spacious feeding platform. Each component prints separately, allowing for complete customization even with a single extruder printer.
Features:
- Multi-part design allows for printing in various colors without needing a multi-extruder setup
- Optional mounting space for Blink camera to monitor and capture wildlife activity
- Sturdy construction designed for outdoor durability
- Architectural details include realistic roof tiles, windows, and stone accents
- Easy assembly with just a small bottle of super glue
- Perfect project for kids to help build and customize
- Complete STL files for all components
- Core frame structure
- Decorative wall panels
- Accent stones and window frames
- Roof components
- Side support struts
- Platform base
What You'll Get:
Assembly Instructions:
1. Print all components, ensuring walls, windows, and accent stones have mirrored versions for each side (already mirrored in the included print profile).
2. Slide each wood side wall into the slots on the main frame (no glue needed for this step).
3. Apply small dabs of glue to the edges of the accent stones for the wall.
4. Attach stones to the main frame at the edges, using the markings on the wall to ensure correct placement of mirrored stones.
5. Once set, apply glue to the rear of the window part and press into the cutout on the stone accents.
6. Attach the side strut accent parts to the two square flat spots on the main frame (these are optional decorative elements).
7. Repeat steps 2-6 for the opposite wall.
8. Place the roof over the four struts on the main frame, inserting struts through the holes with the flat part of roof towards rear.
9. Secure by placing the four roof caps over the struts (can be glued if desired for extra wind protection).
10. Slide the feeding pot into the dovetail on the base before pressing the front stone wall into the slots on the main frame.
11. The front wall serves as a clever retention mechanism for the feeding pot - it physically blocks the pot from sliding out when installed. The first few times you insert it, the fit might feel quite tight, but after a couple of insertions and removals, it will develop the perfect balance of security and ease of use.
12. I strongly recommend leaving the front wall unglued for practical maintenance. This thoughtful design feature allows you to simply pop off the front wall whenever you need to refill the bird feeder. You can then slide out the entire feeding tray, take it to where you store your bird seed for convenient filling, and then return the filled tray to the cabin before securing the front wall back in place. This makes maintenance a breeze compared to trying to pour seed into a fixed feeder!
13. For mounting, attach the fence mount using two 5mm screws.
14. Optional: For Blink camera integration, print the camera mount which slides into the rear dovetail slot and then over the fence mount.
15. Place the Blink camera in the designated slot as shown in the images.
All you need is a small bottle of super glue to complete this great little project that kids will love to help build!